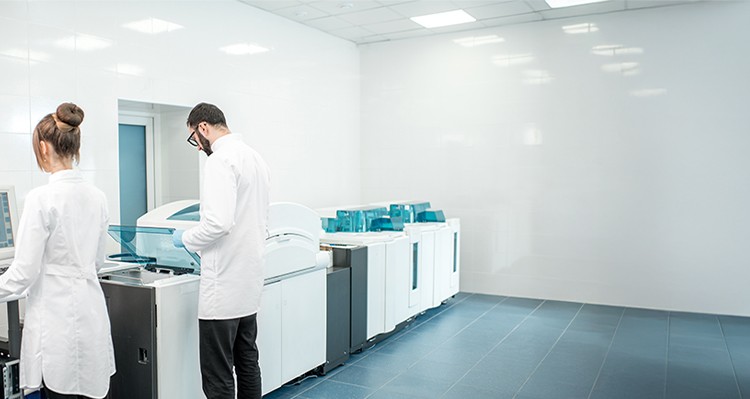
Across India, many hospital labs, QA labs and small pharma units still operate from structures that were never designed as clean rooms. Surfaces are painted masonry or tiled walls with exposed grout and difficult corners. Retrofitting these spaces with hygienic cladding panels for walls and ceilings is often more practical than rebuilding from scratch.
With the right design and installation, legacy labs can move closer to modern lab clean room wall panels performance while keeping downtime under control. This is exactly the problem Kleenclad systems are built to address.
Why older labs struggle to meet today’s hygiene expectations
Legacy labs usually rely on paint, tiles or basic laminates. Over time, repeated cleaning with strong chemicals leads to micro‑cracks, peeling and staining. Grout lines in tiled walls darken and trap residues. Corners, service penetrations and ceiling junctions become chronic dirt traps. Even if airflow and filtration are upgraded, these surfaces make it hard to control contamination and to demonstrate compliance during audits.
Modern clean room thinking starts from the envelope. Walls and ceilings should be smooth, non‑porous and easy to wipe down, with minimal joints and well‑controlled details. That is where prefabricated lab clean room wall panels change the trajectory of an older facility.
How do hygienic cladding panels transform existing walls?
Retrofitting with hygienic cladding panels for walls typically means installing prefabricated PVC or similar panels onto a prepared substrate, then finishing joints, corners and skirtings with purpose‑made trims. This approach brings several advantages for upgrade projects:
- Existing structural walls usually remain in place, which reduces structural work.
- Installation is faster than full demolition and reconstruction.
- Panels can be cut and detailed around existing doors, windows, benches and services.
When specified correctly, the new panel surface becomes the cleanable “skin” of the room, while the original wall simply provides structural support.
What defines effective lab clean room wall panels in retrofit projects?
In a retrofit, panel performance and detailing have to compensate for the limitations of the original structure. A good system should offer:
- Non‑porous, smooth faces that resist staining and tolerate routine use of alcohols, oxidisers and neutral or alkaline detergents when applied as guided.
- Seam‑minimised joints, with sealed or welded connections that leave no open gaps between panels.
- Coved skirtings and internal corners so floor‑to‑wall transitions are easy to mop and do not hold standing water.
- Options for integrated ceilings or compatible ceiling interfaces to complete the envelope.
Kleenclad panels add another layer of support through built‑in silver‑ion technology. This provides continuous surface protection that helps reduce microbial load on the panel surface throughout its service life. It is always positioned as a complement to cleaning and disinfection, not a replacement.
Planning a retrofit: from “regular lab” to controlled space
Retrofitting an active lab is more like playing a careful back‑nine than a quick practice round. A structured plan keeps risk low and progress steady:
- Survey and zoning: Start by mapping the space into functional zones: sample receipt, processing, storage, and support areas. Identify where lab clean room wall panels will create the greatest benefit in terms of hygiene and inspection risk. High‑risk or high‑traffic zones usually get priority.
- Substrate evaluation: Check existing walls for moisture, loose plaster, unevenness and chemical damage. Where necessary, repair, level and prime so that cladding panels for walls have a sound base. This step determines how long the new system will perform.
- Interface design: Detail how panels will meet floors, ceilings, door frames, windows, pass‑throughs and services. Decide which edges will use coved skirtings, which corners will be thermoformed, and how penetrations for utilities and equipment will be sealed.
- Phased installation: For busy hospitals and small pharma units, shutdown time is limited. Panels can often be installed in phases, room by room, with careful isolation and dust control. Prefabrication and clear method statements help crews move quickly while preserving cleanliness in adjacent areas.
Kleenclad’s role in legacy lab upgrades
Kleenclad systems are designed specifically for hygiene‑critical environments, so they lend themselves well to staged retrofits:
- The panels are manufactured with a smooth, non‑porous surface and a core that supports robust bonding to prepared substrates.
- Built‑in antimicrobial surface protection, based on silver‑ion technology, helps inhibit microbial growth on the panel surface for the product’s lifetime and does not wash off under normal cleaning.
- A family of trims, coved skirtings and corner accessories supports seam‑minimised detailing around existing doors, windows and equipment.
- Method statements and installer guidance ensure that the performance seen in datasheets is achievable on real projects with local contractors.
By combining these factors, older labs can move from porous, difficult‑to‑clean walls to a continuous hygienic skin that behaves more like a modern clean room envelope.
Ceilings and services: completing the cleanable shell
Walls alone are not enough. In many legacy labs, exposed services and basic gypsum ceilings are significant contamination points. When budgets allow, it is worth extending cladding panels for walls, thinking of the ceiling:
- Ceiling panels with flush or sealed joints reduce dust ledges.
- Integrated service panels for lights, filters and diffusers simplify cleaning around equipment.
- A consistent wall‑to‑ceiling junction, often with a radius cove, removes one of the most stubborn cleaning challenges.
Even if a full walkable, clean room ceiling is not required, an upgraded, flush‑finished ceiling combined with modern wall panels moves the space closer to clean room expectations.
Operations, cleaning and lifecycle advantage
The real test of any upgrade is what happens once the lab is back in routine use. With lab clean room wall panels, cleaning tends to become more standardised:
- Surfaces respond predictably to approved chemicals.
- There are fewer micro‑defects where soil accumulates.
- Visual inspection is easier, because cracks, grout lines and patchy paint are no longer present.
Over time, this leads to lower cleaning labour per square metre, fewer deep‑clean interventions and a smaller backlog of “wall repairs before audit.” Panels also tend to outlast repaint and re‑tile cycles, which protects capital budgets.
Conclusion
Retrofitting legacy labs does not always require a full rebuild. Hygienic cladding panels for walls and ceilings allow hospitals, QA labs and small pharma units to convert ageing rooms into smoother, more controlled environments that behave much closer to modern clean rooms.
By focusing on non‑porous surfaces, seam‑minimised joints, well‑designed interfaces and compatible cleaning protocols, lab clean room wall panels from Kleenclad provide a practical path forward.
For Indian facilities that need better hygiene control, less downtime and a clearer story for auditors, treating the wall and ceiling envelope as an upgrade priority is one of the most effective moves they can make.


